
DIY Chair Upholstery: Kid Proof
When we recently purchased our new home, I knew I did not want our current kitchen chairs making the move with us. I had bought them straight out of college and they had seen better days…they had rattan bottoms that looked like they had been mauled by dogs…we do not own a dog. The wear and tear of three kids is merciless. So, a few years back I invested in linen slipcovers from Ballard, had them monogrammed, and then nagged my kids to remove them before eating. Now, while it did keep the appearance of the chairs presentable, my kids and husband were beyond annoyed. There had to be a better solution. How can we own and actually use gorgeous, upholstered chairs in our everyday lives, without them looking horrendous three meals later? Does such a fabric really exist? Maybe. But after trying several “high performance” fabrics, I have yet to find one that can make it through spaghetti for dinner, chocolate for dessert, followed by a cup of cocoa the next day.
So what’s a Mama to do? Enter the DIY kid proof upholstered chair. After searching and searching, I finally came up with a plan to not only achieve the custom, clean look I was longing for, but also found a way to make my beautiful chairs kid proof! Bonus: this recovering method is easy, and meal cleanups? You simply wipe a wet rag across the cushions and you’re done. Let’s get started…
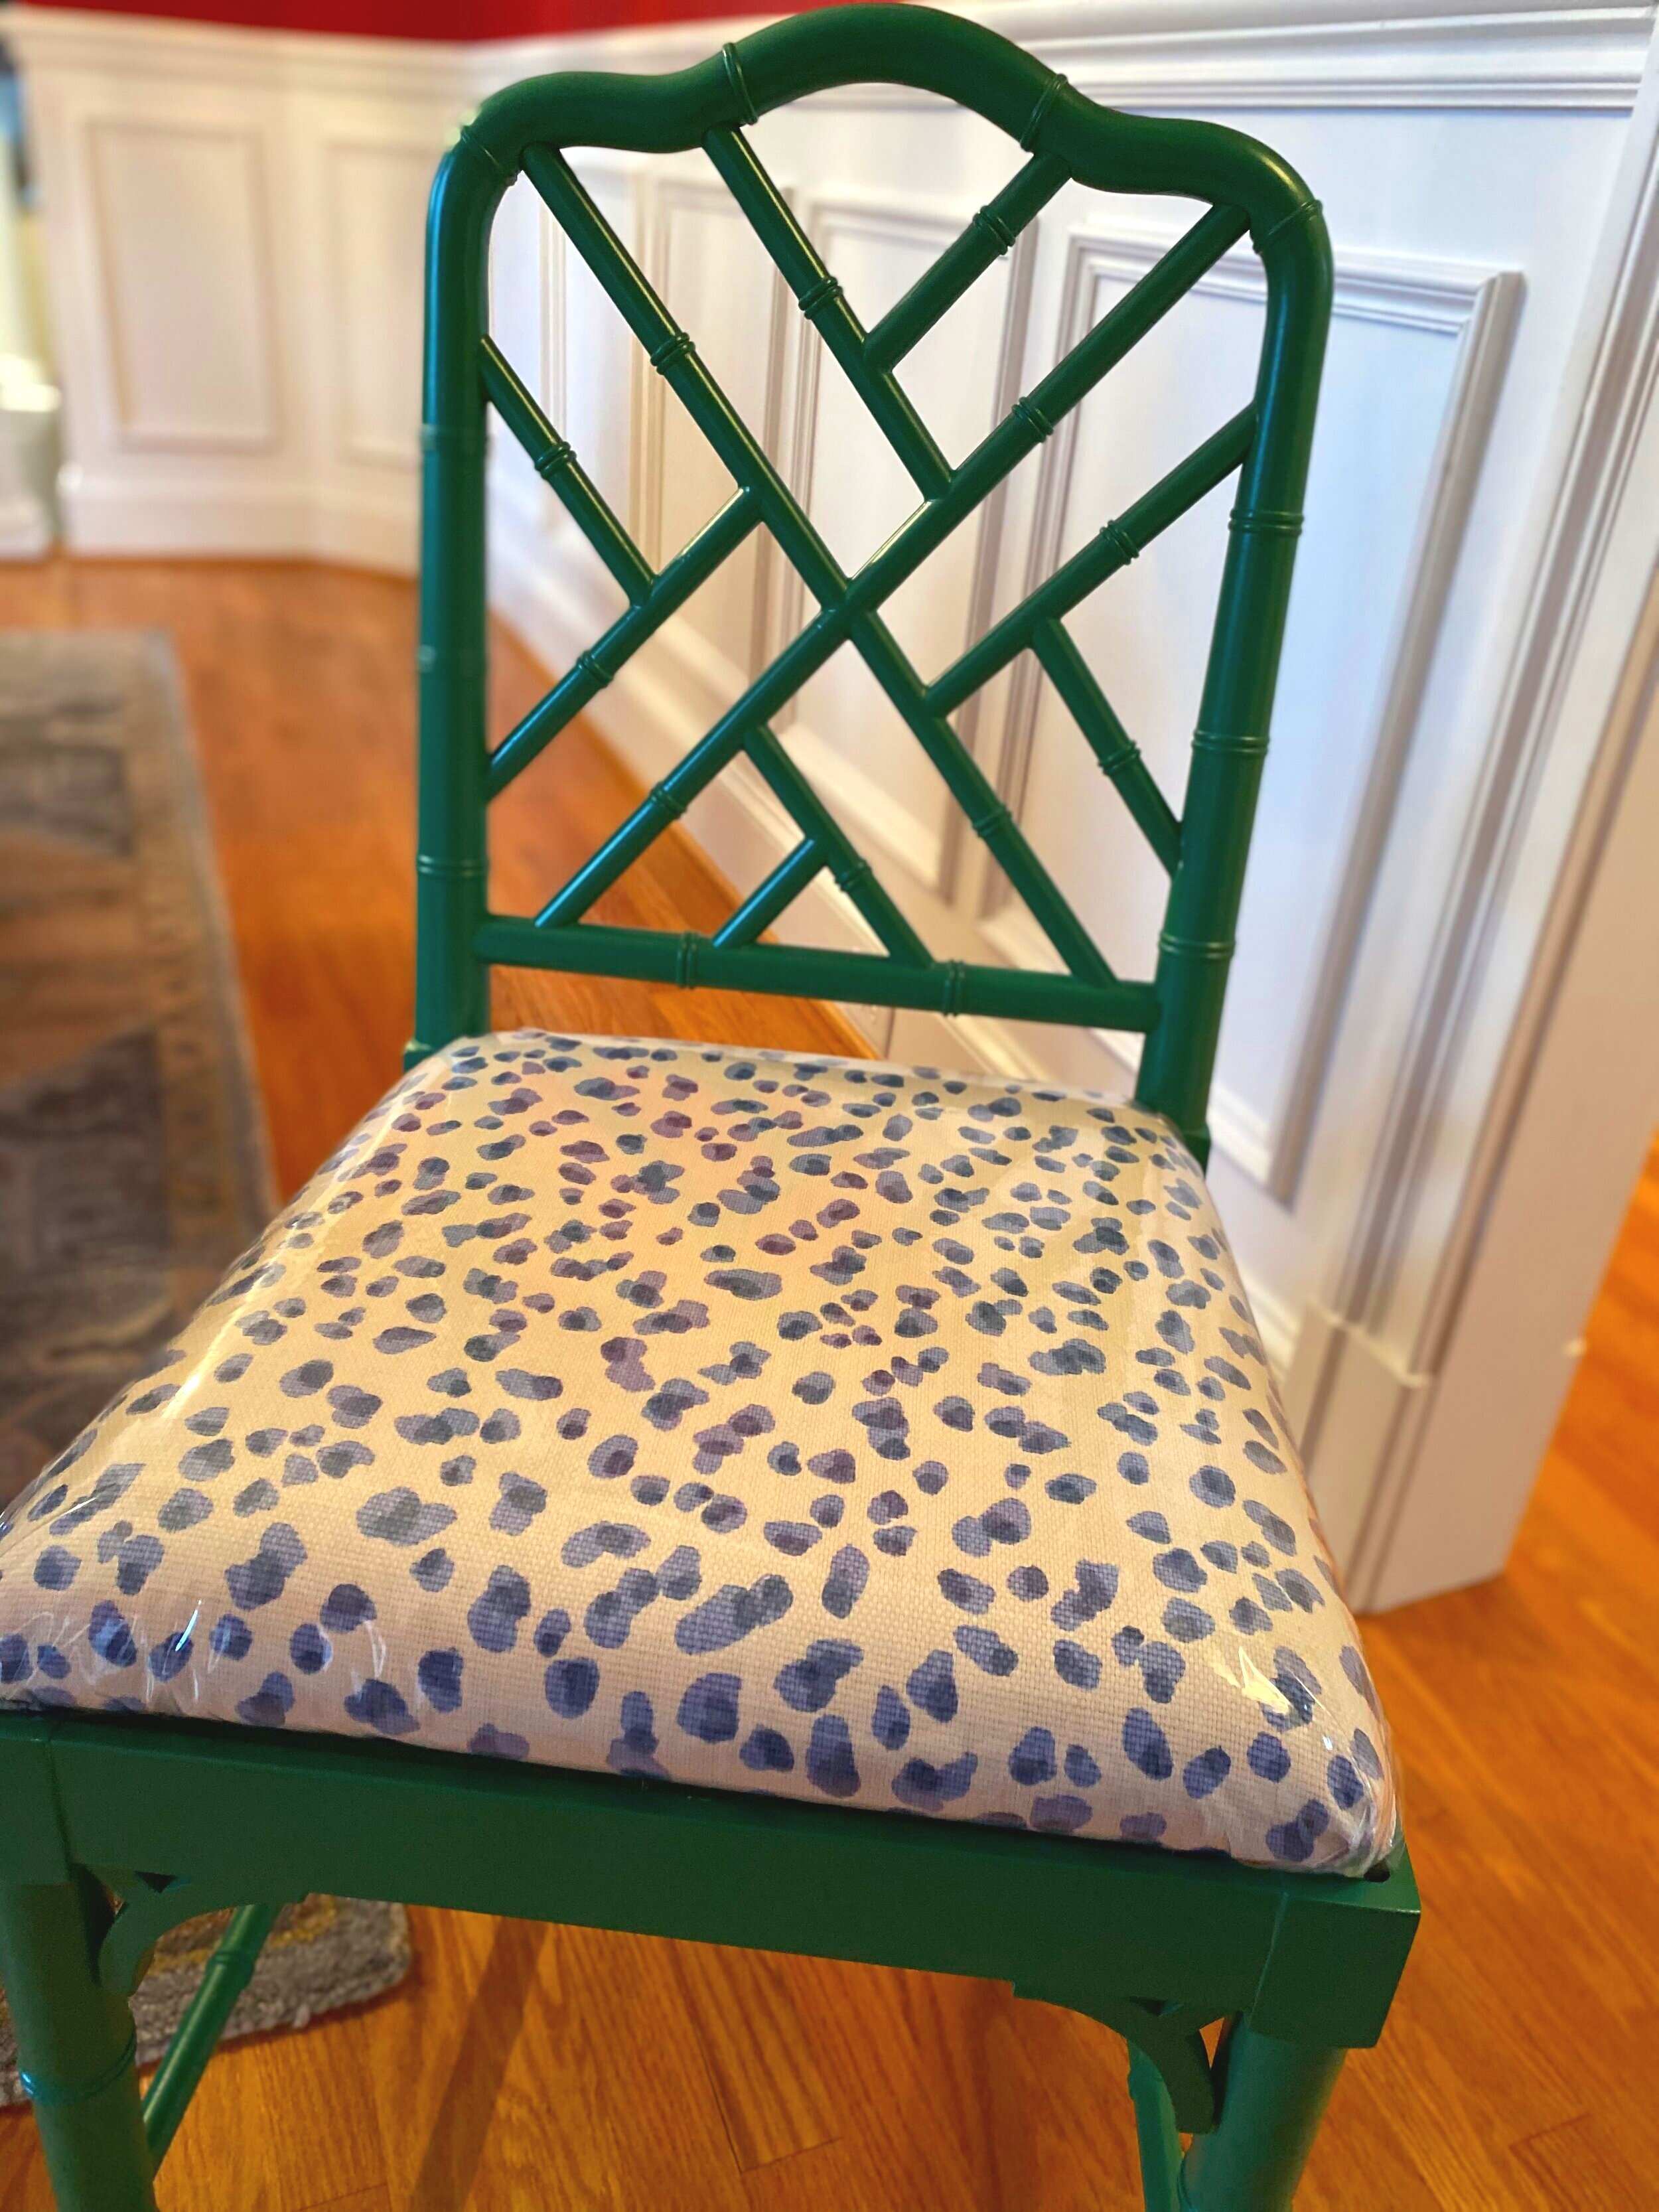
The first step was to find the perfect chair. Personally, I knew I wanted to Chippendale style, with faux bamboo detail and a classic design look. The twist? Update the upholstered cushion in a fun, fresh fabric. Here is the chair I went with, in her original form:

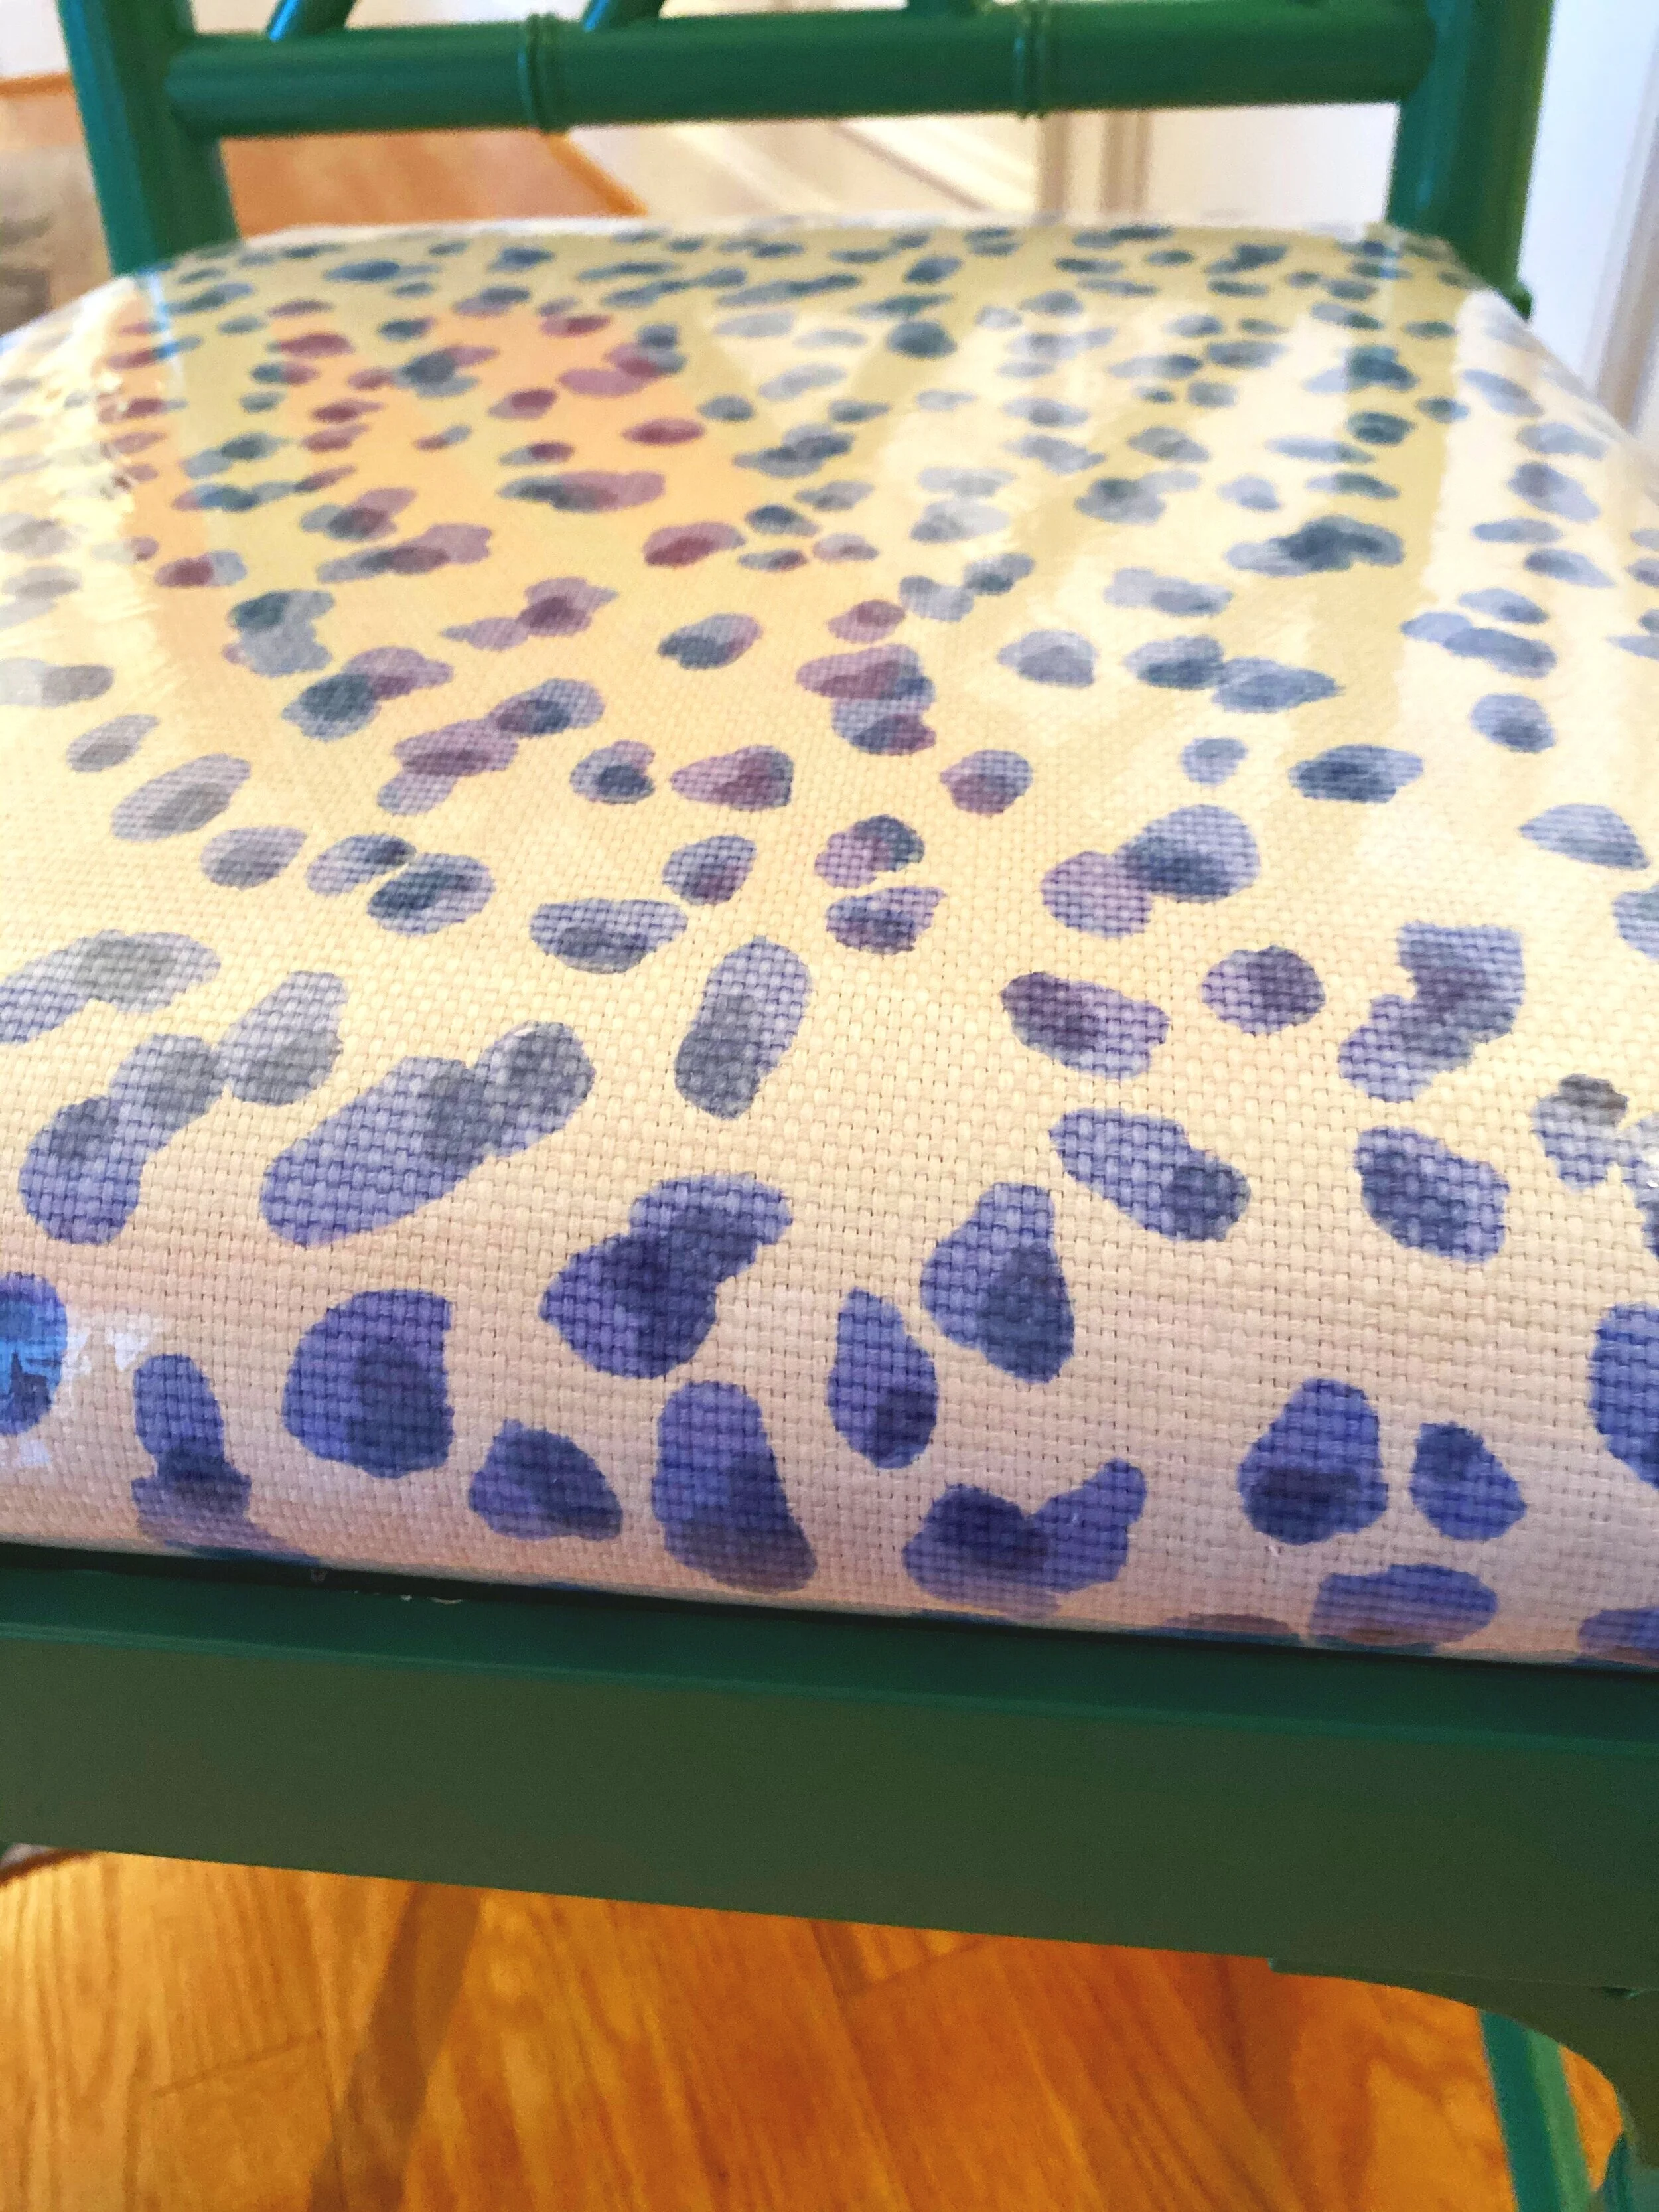
What a beautiful shade of Kelly Green! Now, to jazz up the cushion and make it kid proof. First up, fabric selection. I selected a woven, upholstery weight fabric in a fun blue and white cheetah print. I’m linking a the Ronnie Gold Cheetah pattern in Green here. Etsy is such a great place to purchase beautiful fabric by the yard, and this shop did not disappoint. You can also find a similar looking fabric with a smaller scale, Mira Blue, available from Ballard Designs. I would suggest you order about half a yard to .75 yards per chair. For this project, I recovered 5 chairs and ordered 4 yards. This gave me plenty extra, but also the confidence that I could recut again, if I made a mistake the first time!

Next, to get the cushion off the chair…this was the most challenging part. Not because actually removing the cushion was difficult, but the process it took to get to that point. This beautiful chair was advertised as being very simple to remove and recover, but upon inspection, I couldn’t see how to remove the cushion without damaging the chair! There were no corner screws attaching the cushion to the frame.
I reached out to the Seller, and received very poor customer support. After a while, I gave up on a reply and my husband and I began disassembling one of the chairs. In the end, we were able to get our cushions off by simply placing a board on the underside of the cushion and banging all four sides, forcefully, with a mallet. It popped right off! This being said, all chairs are different, and most will have a screw in all four corners you can easily remove.

The next step was to attach the new fabric to the cushion…right over the top! As these cushions were properly stuffed and in great condition, there was no need to completely disassemble and replace the stuffing. For this step you need your fabric, a heavy duty stapler, heavy duty staples, and determination : ). Staple guns can easily jam…be forewarned…but the end results are so worth it!


Stretch the fabric, working the sides one at a time, until you get a tight fit. Then staple and trim the excess fabric from the underside.
Next comes my favorite part…make it kid proof! I applied a thin, pliable, and clear vinyl right on top of the cheetah fabric. Boom! This makes your cushion instantly kid proof, durable, and most importantly, wipeable. After researching several clear vinyls, I chose a lighter weight, which wouldn’t be as heavy or detract from the aesthetic look of my fabric. JoAnn Fabrics carries this by the yard! I would absolutely recommend going with the 8 gauge weighted vinyl…if you go too thick, the vinyl will not be pliable and will not look as high end.

Last step, my friends! Reattach the cushion. For this particular type of chair, I simply placed the cushion back on top of the frame and…sat on it : ). Ha! This cushion was held on by tacks sticking out of the top of the frame, which sank back into the cushion once I sat down. Most chairs will have a screw in each corner, which you would use to reattach the cushion.

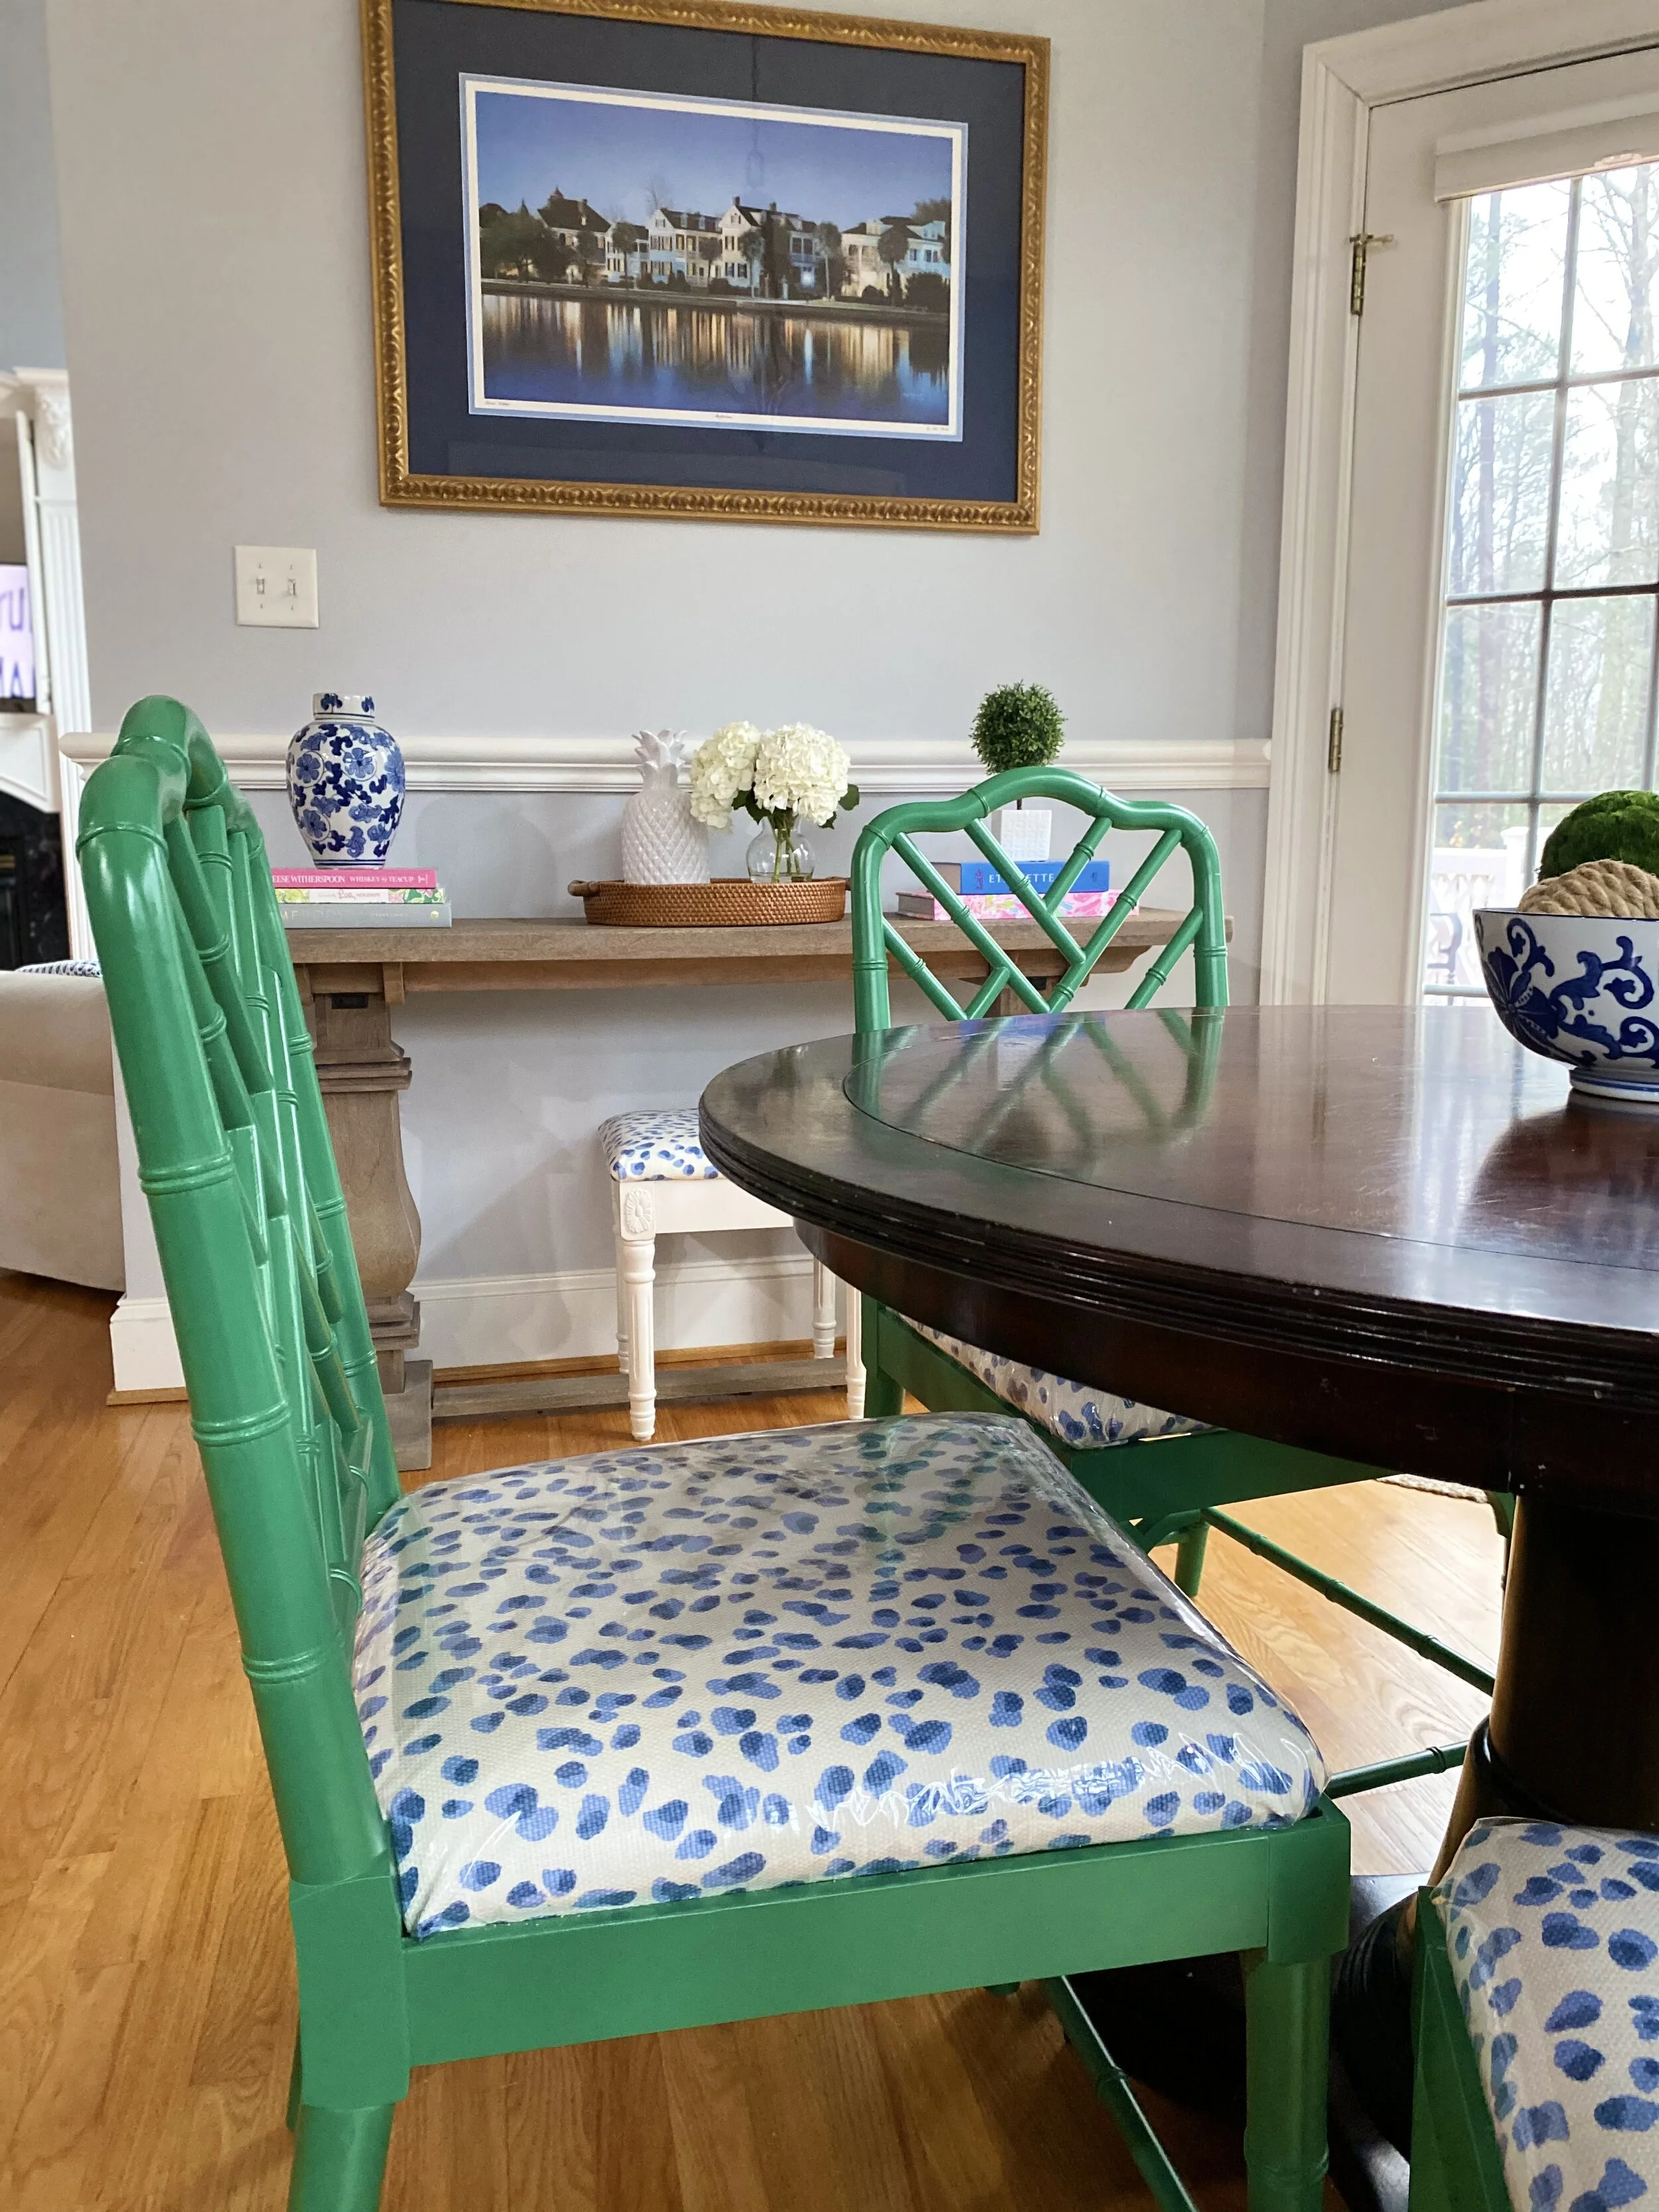
I’m so happy with how these beauties turned out! These chairs live in our eat-in kitchen and are used relentlessly. The kids feel grown up, we no longer have to remove slipcovers, and there’s less drama over spills. Win win!


If you have any questions, I’d be happy to help. For more DIY, you can find how I brought a Faux Bamboo desk back to life here. Have a lovely Sunday ya’ll!